So far this is just a quick review, I have only used these products for few rides. so here is what I think so far.
First Impressions:
When I saw it 25% off on black week sale at bikeshop.no , I went for it, I had measured the the length so I thought it might fit, and it did with room to spare.
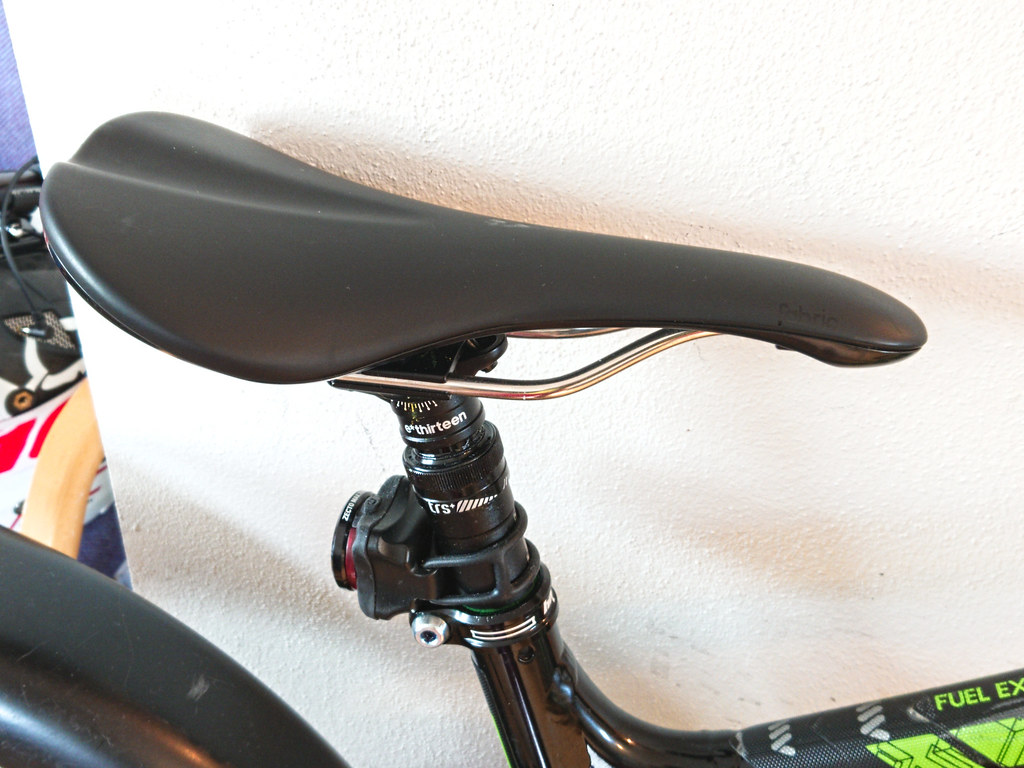
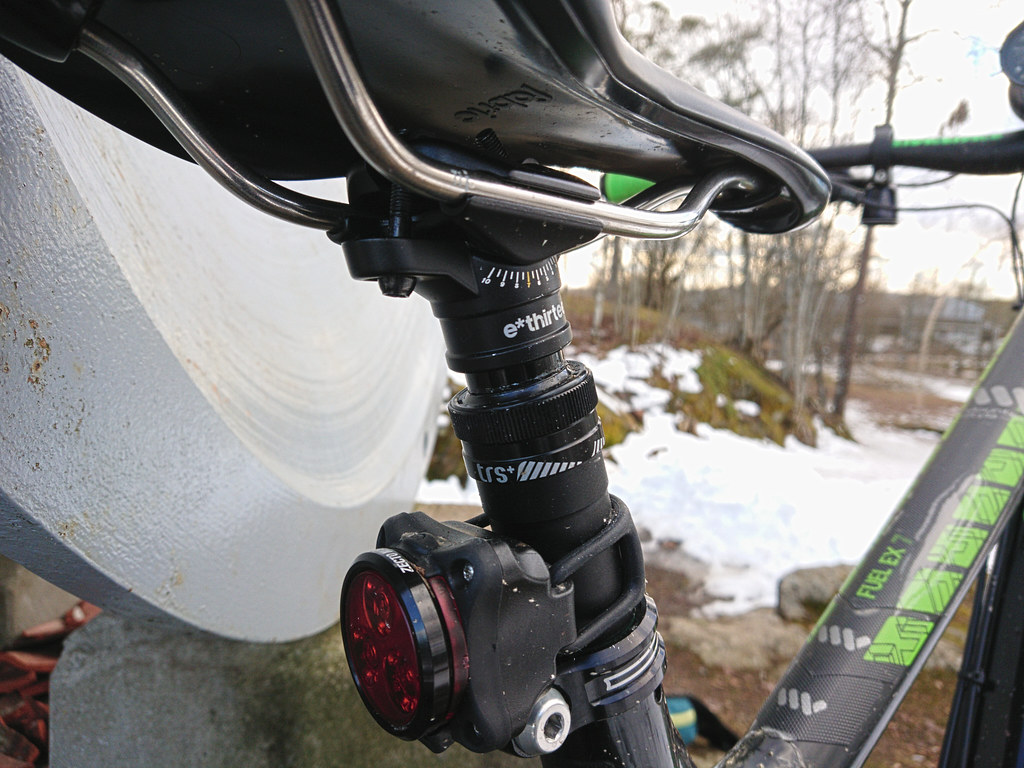
As you can see there is enough room to secure the rear light.
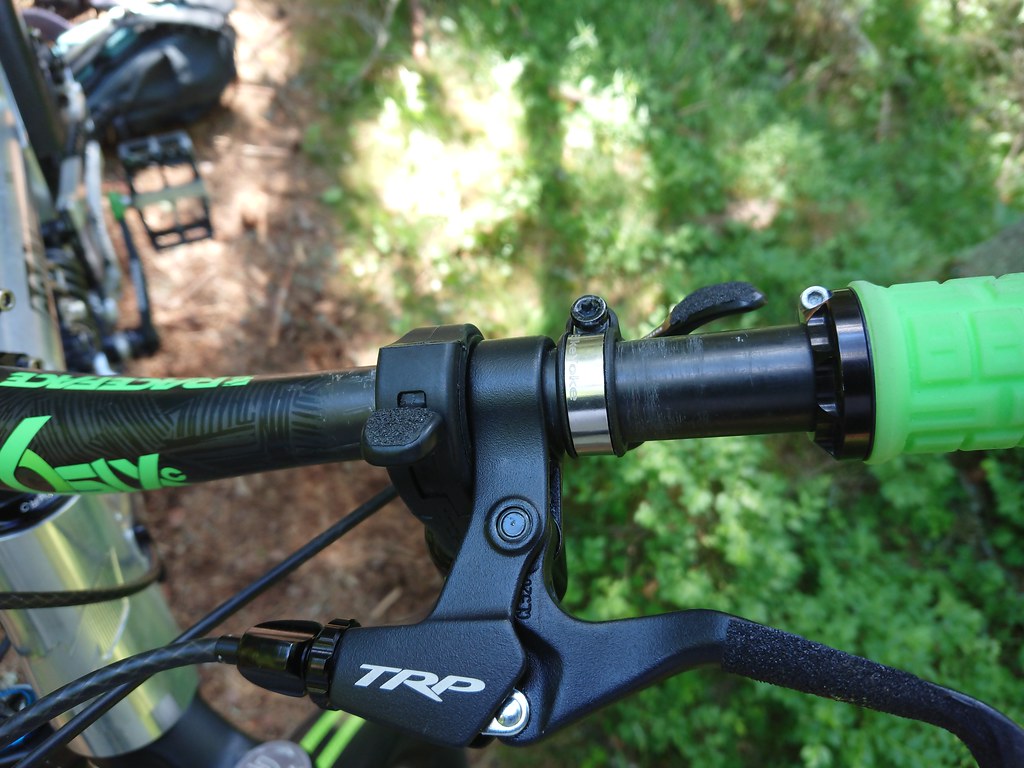
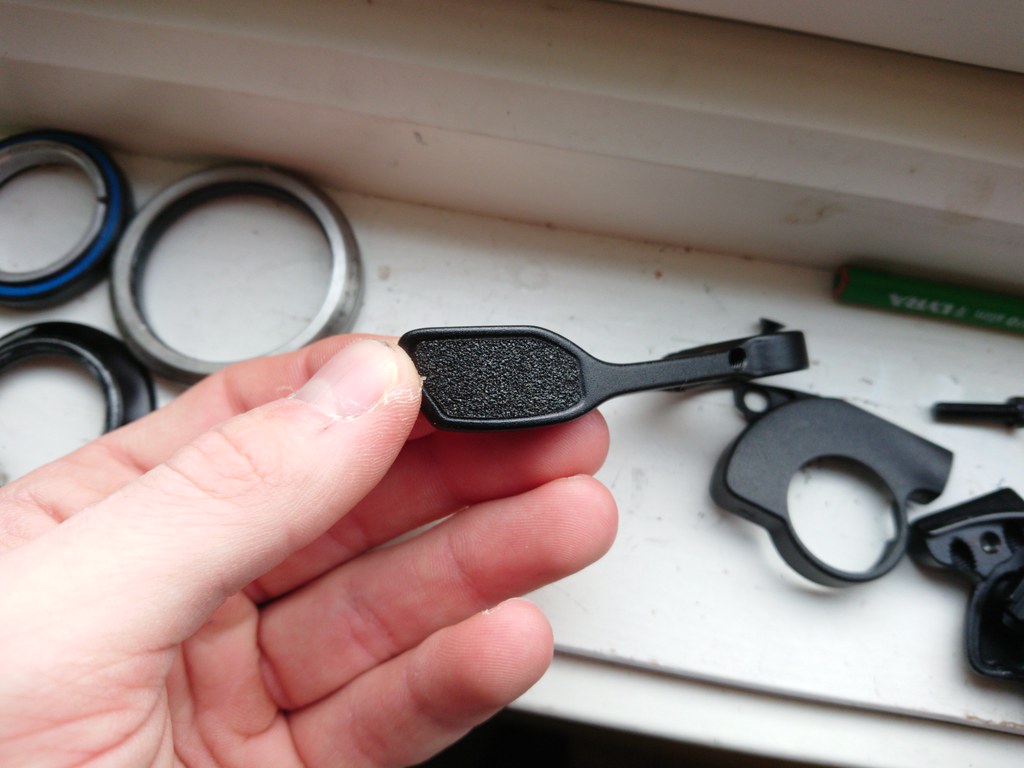
The remote was way too slippery, I had to use grip tape/anti slip tape.
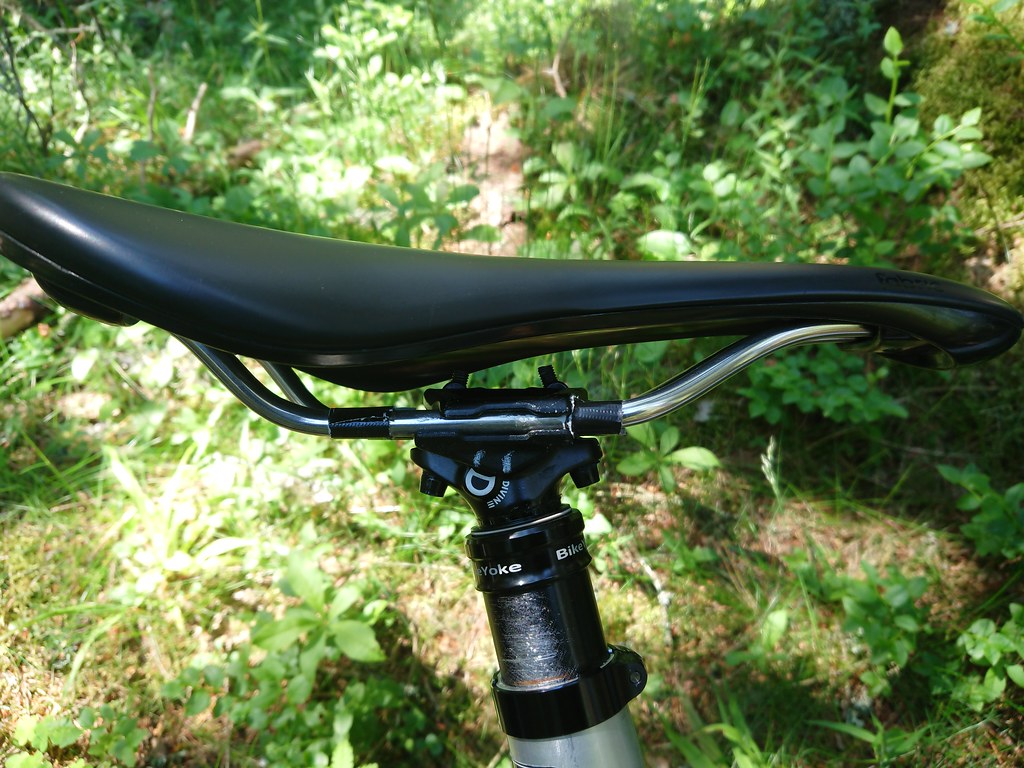
Fully extended on Nicolai/Geometron G1 Size Large.
The Positive:
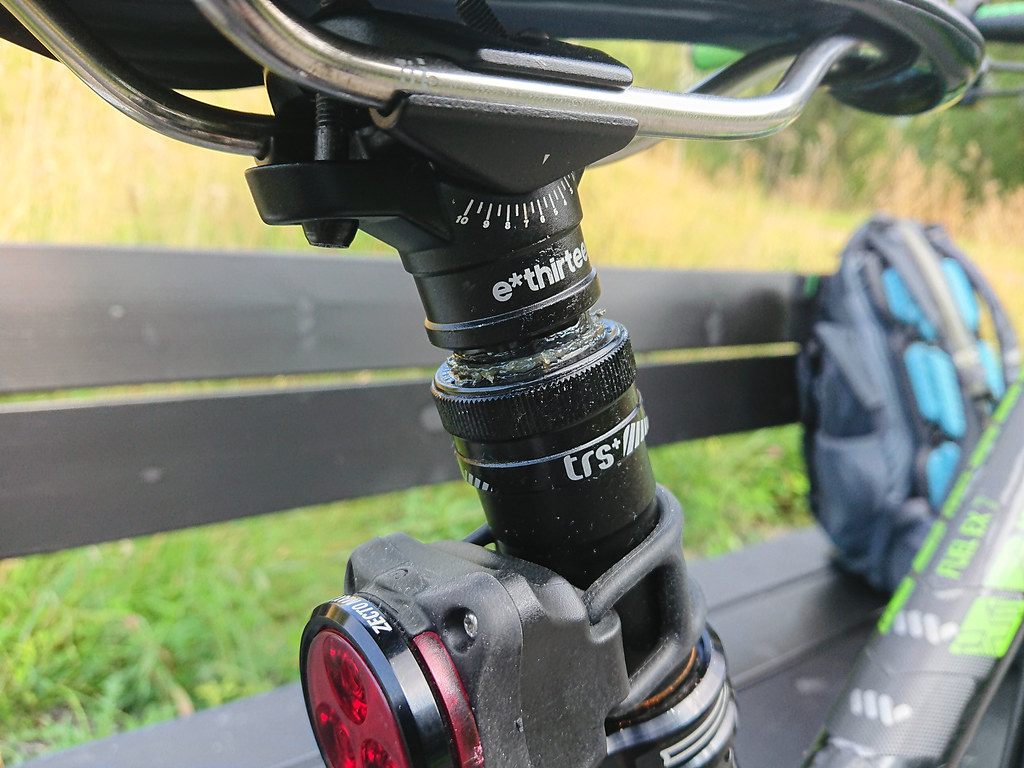
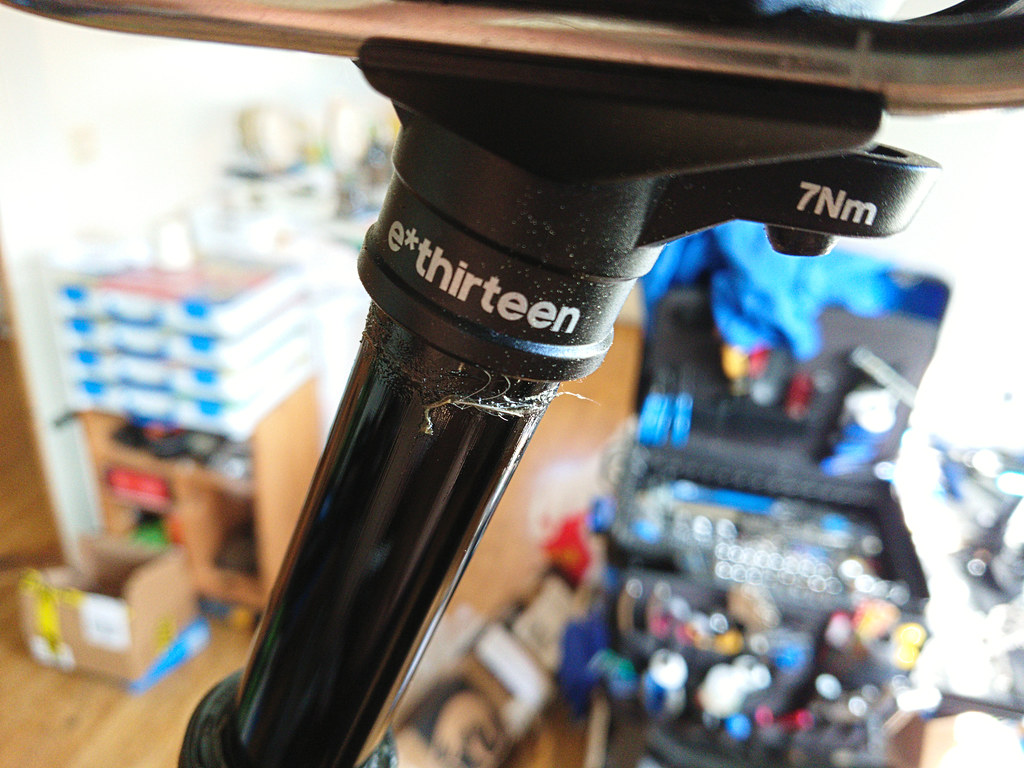
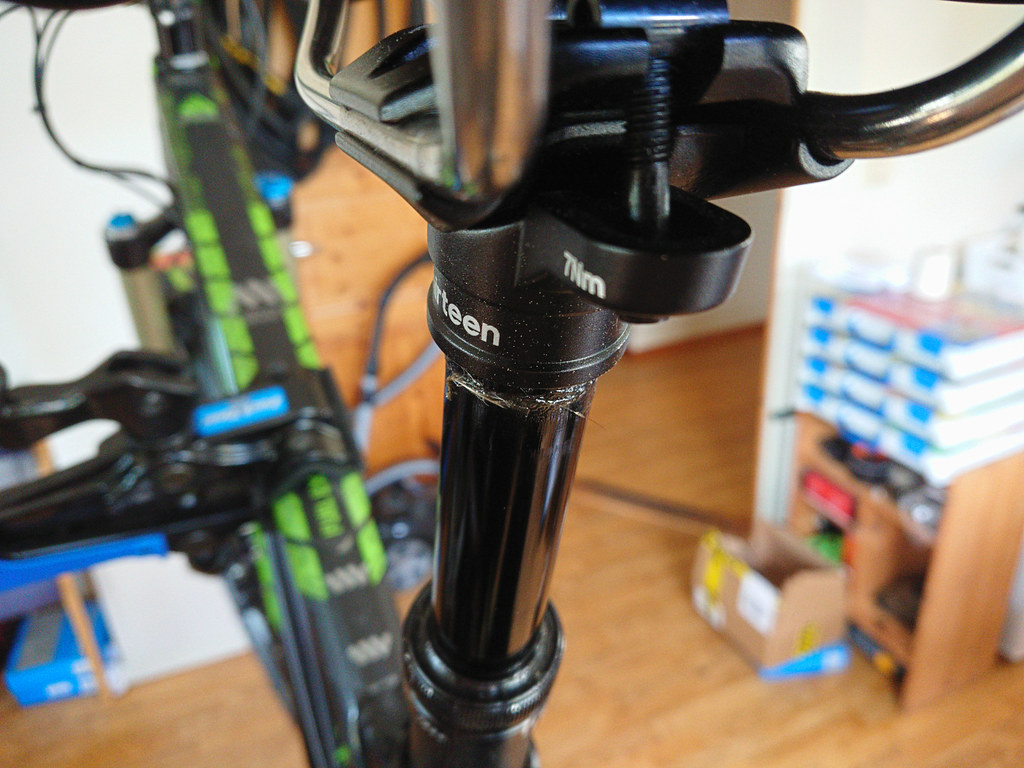
Minimal play, so the stanchion stays a lot cleaner than the E13 dropper post, which was a greasy mess after evry single ride, which is not the case with BikeYoke Divine
smooth actuation
light enough lever action, I don’t feel like I need lighter actuation, the Revive has that, but for me Divine offers great actuation.
light and easy to drop all the way down.
low stack height
The negatives:
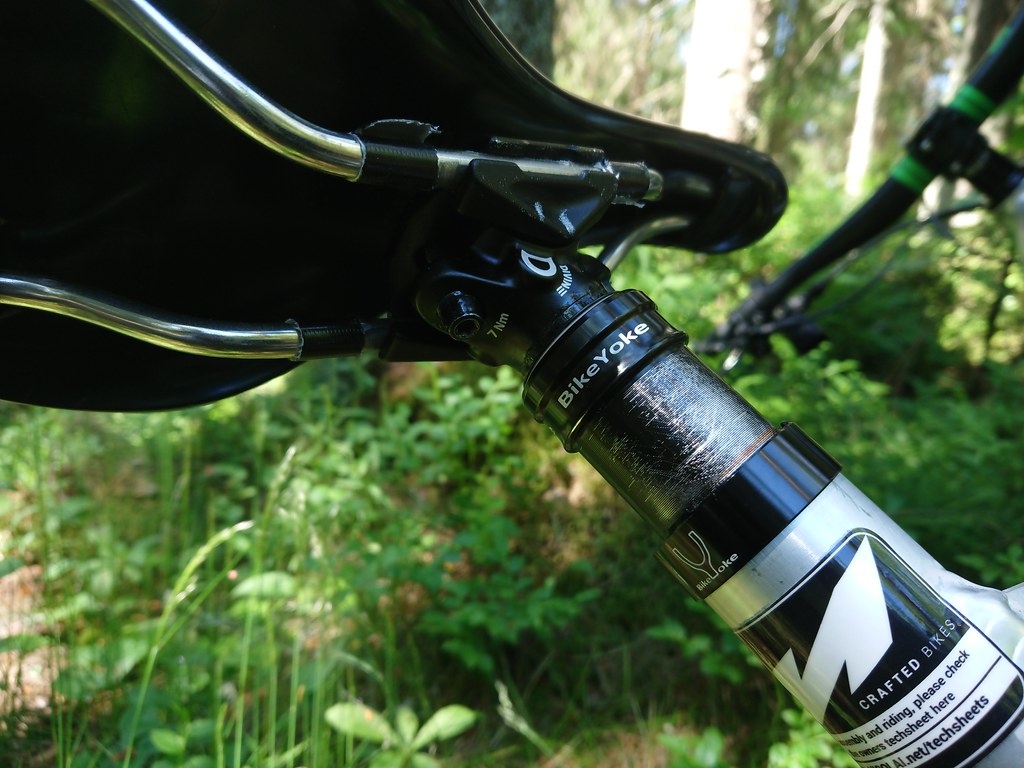
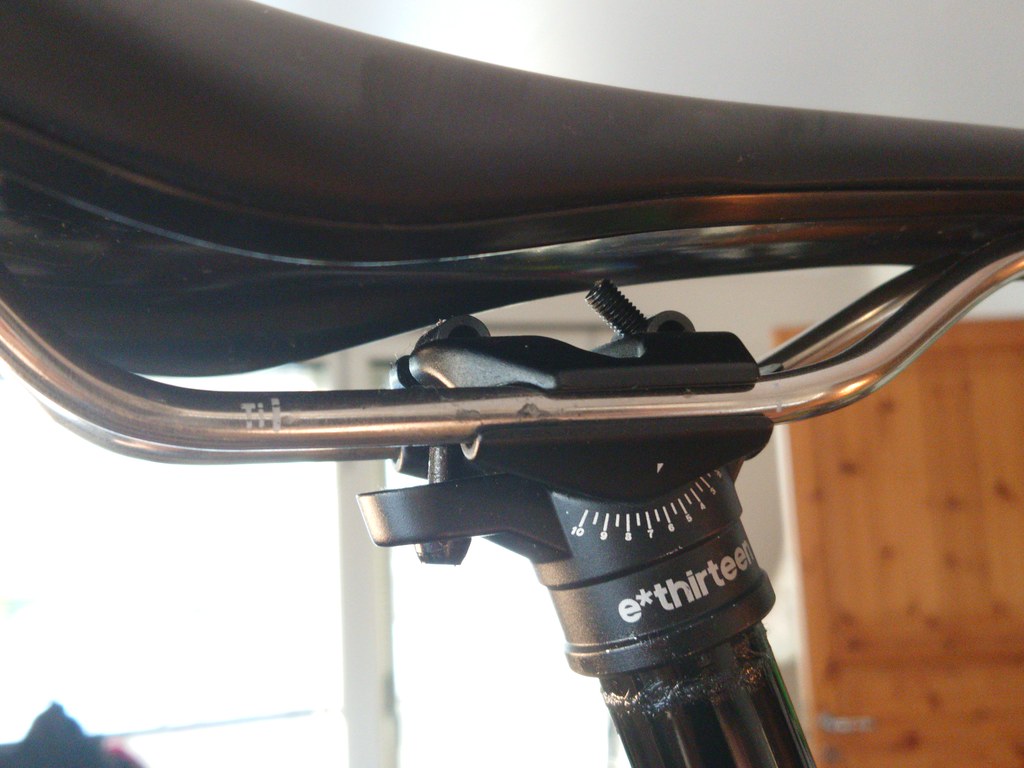
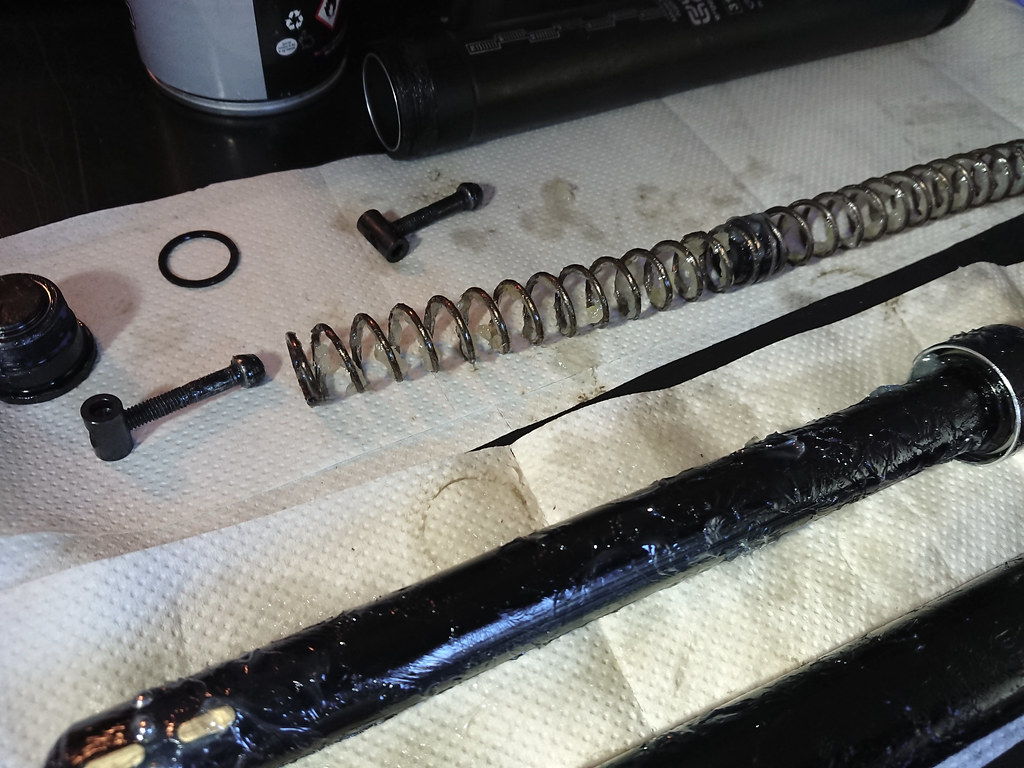
Barrel cable clamp at dropper post is a flawed clamping method. I rode 3 rides in with #bikeyokedivine I thought this method of wire attachment was flawed, and to day I experienced what I suspected would happen, the bolt at the barrel cable clamp loosened the wire slipped, this method is useless @bikeyoke I suggest you make the system work like this: attach the wire in the hook run it trough the housing and end up at the lever, these sizes most multi tool don’t have and having to take the seat post out during evry single ride will be annoying, yes I tightened tight enough and used Loctite 243. Now I will have to try it the way I mentioned. This way I don’t have to take the dropper post out just have one the bolt on the remote to tighten, which is easy to access.
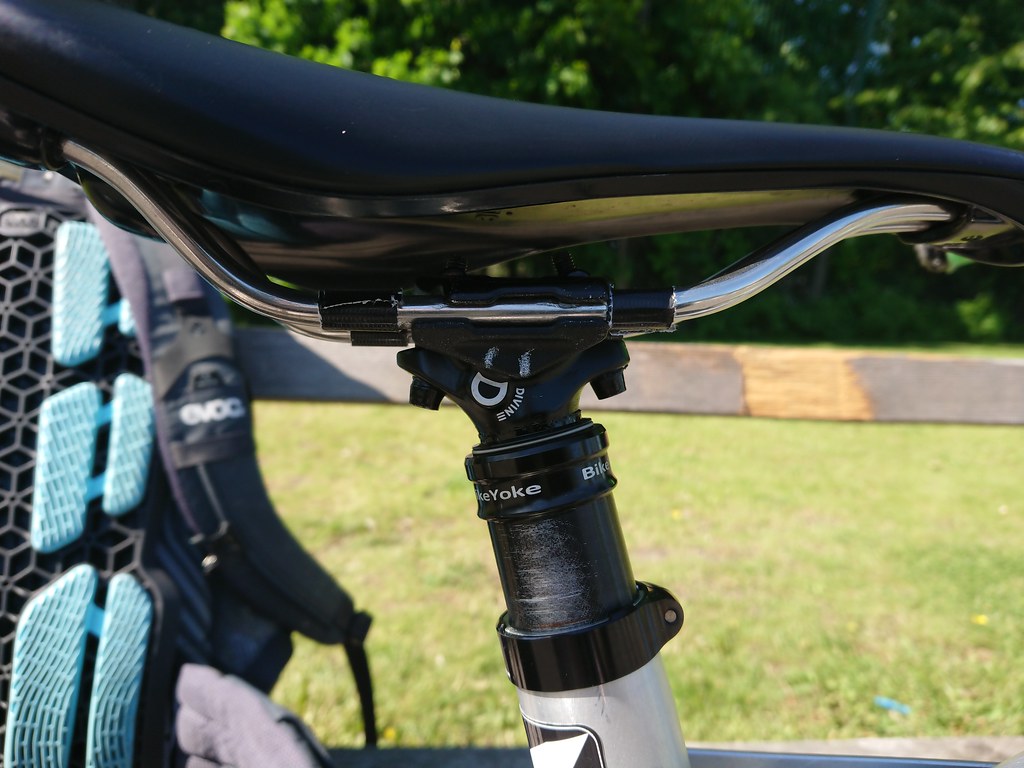
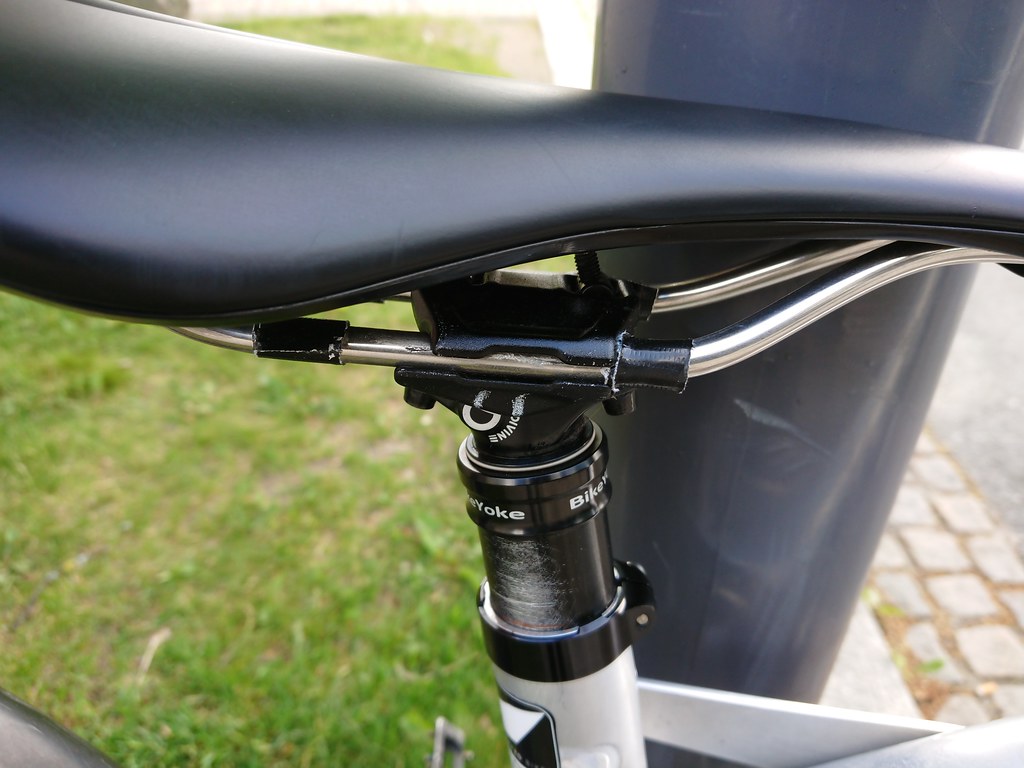
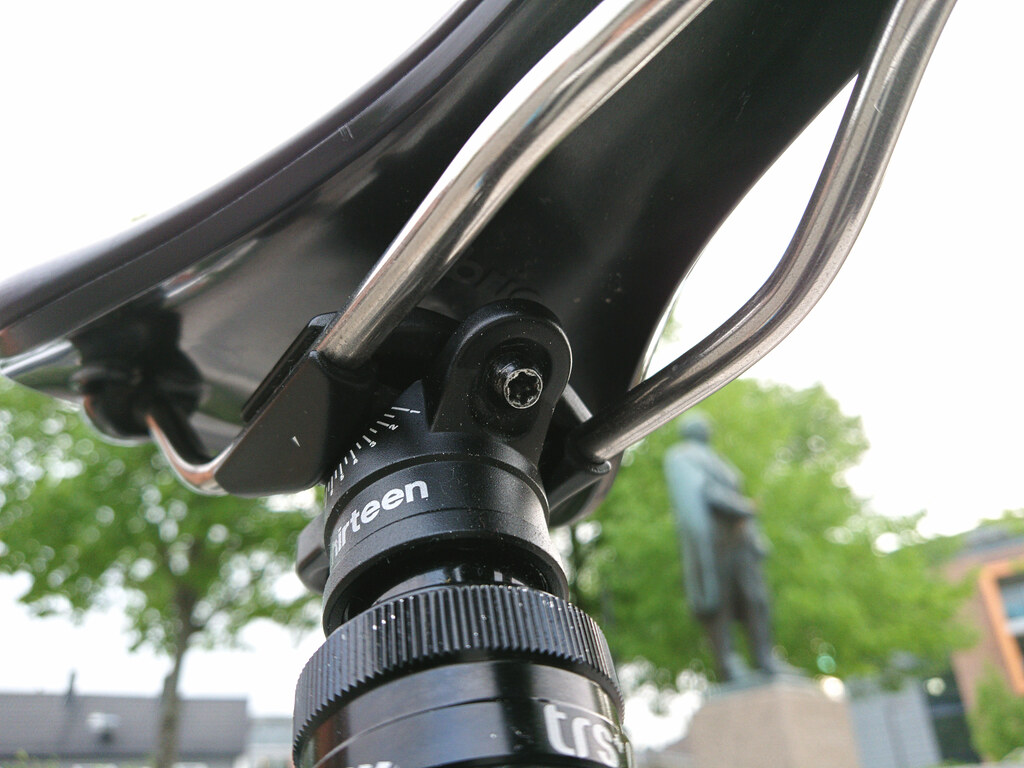
Not a surprise the saddle rail clamp loosens in rapid temp changes
Early in the ride 11.06.2020 also you can see how I marked the angle, with white pencil.
some time into the ride 11.06.2019
11.06.2019
11.06.2019 close to end of ride, I eventually stopped and fixed this. the hack with Gorilla ta is nice to tell the position the saddle should be at.
Verdict:
So far it looks promising.
So far it seems to be one of the best options on the market.
But I will update you on my experience with it long term.
It does what it says on the box, but for really long rides, put on a thick layer of it, as much as you can get on the pad, for example a 4 hour ride. cus you can use it up. I have tested this, so I know, just thin layer won’t cut it even with 2-3 H ride( depending how much I sit of course), you will literally get butt hurt, but if I go more than 4 H my butt will hurt just from sitting, even with comfy well fitting saddle, eventually my butt will hurt, but then I hurt everywhere, and it’s different type of pain, then my legs are getting weaker, my upper body too if I do a lot of tech, climbing. this cream won’t stop that. It does what it promises and nothing more.
The cooling effect is true, but it only lasts few minutes.
I always ride with Chamois Boxer short, and with Chamois cream, if I don’t my butt will hurt if I do it for too long.
I prefer to cover the pad with it instead of only butt or both, seems like a easier solution that don’t make a mess.
And of course I use a fresh short for each ride.
But Assos offer product that repairs the skin after friction, it’s called Assos Skin Repair Ge, but I haven’t’ tried this.
But if you already are sore then Zink ointment will work great, for cracking skin at the fingers it’s a must. that’s a issue I get in the winter. you might find others that say so too, it works & is easy to get at a pharmacy.
When I first posted the review in the April of 2019 I have used this dropper post for few months, but I was feeling horrible most of January & February so did not put it to as much use as I hoped for, but also used it some in January, and trough march.
But then eventually many months of use use on it, many climbs, dropped the saddle many times, did wheelies, crashed, so it got put trough a lot that a dropper post needs to handle.
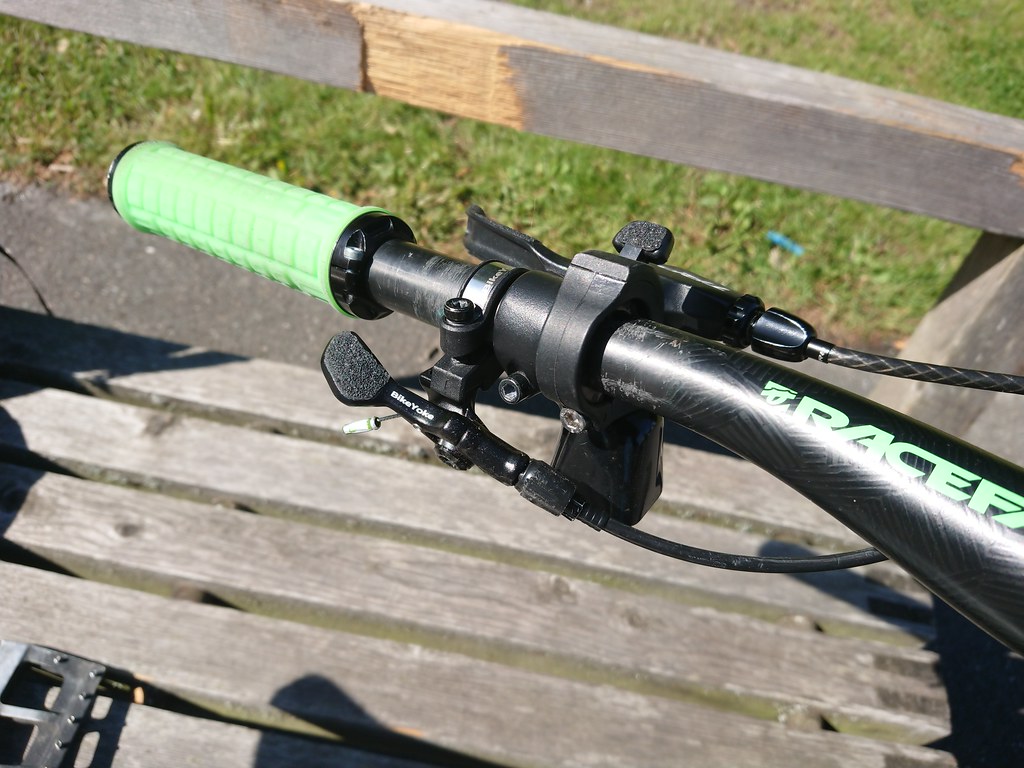
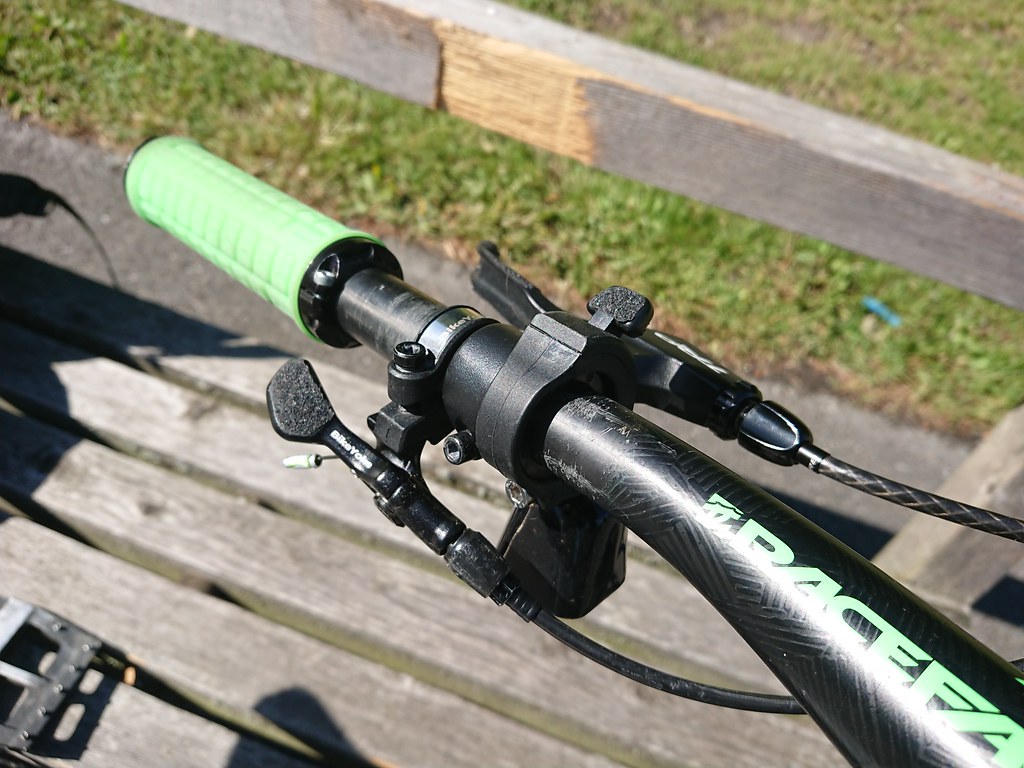
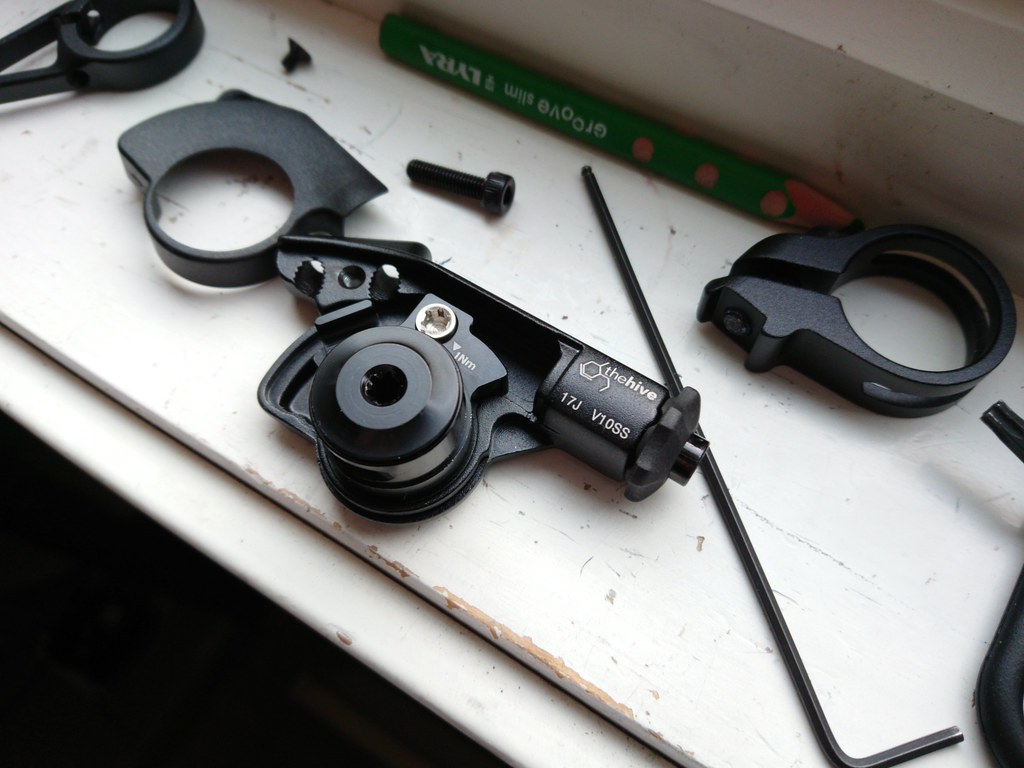
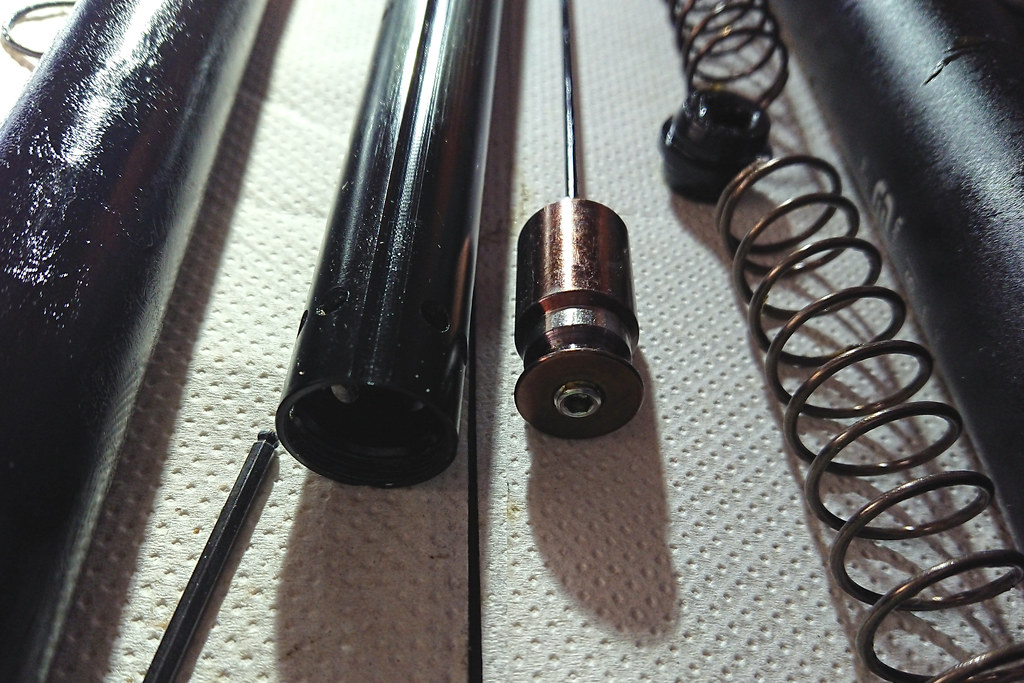
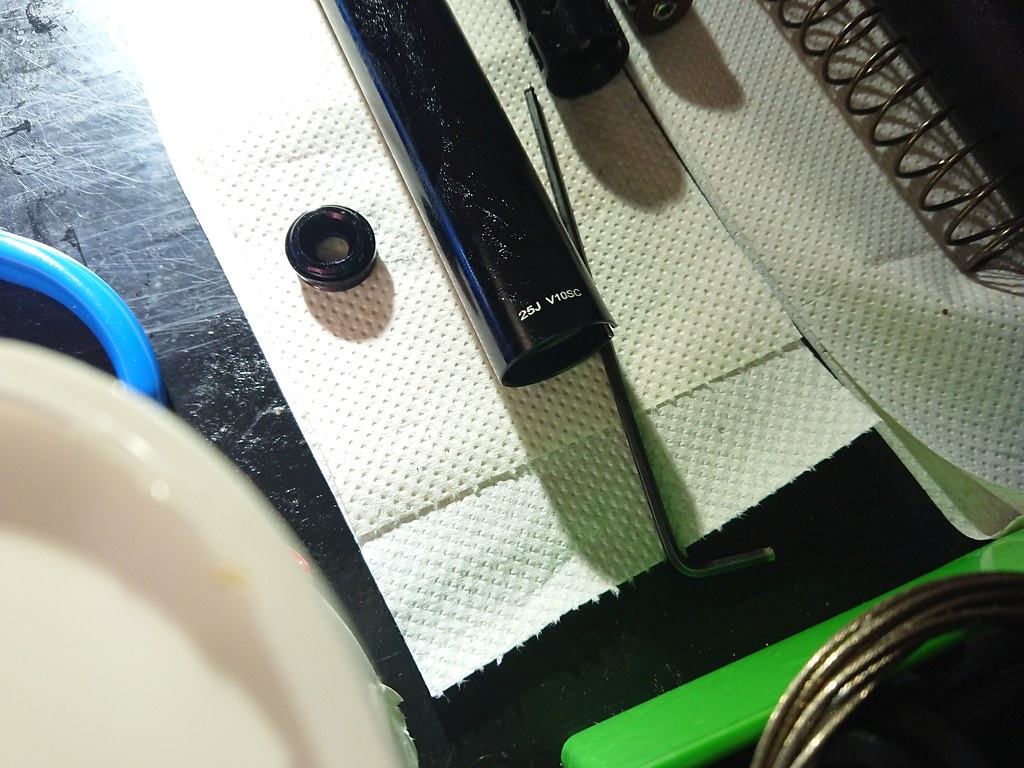
The remote version 17J V10SS :
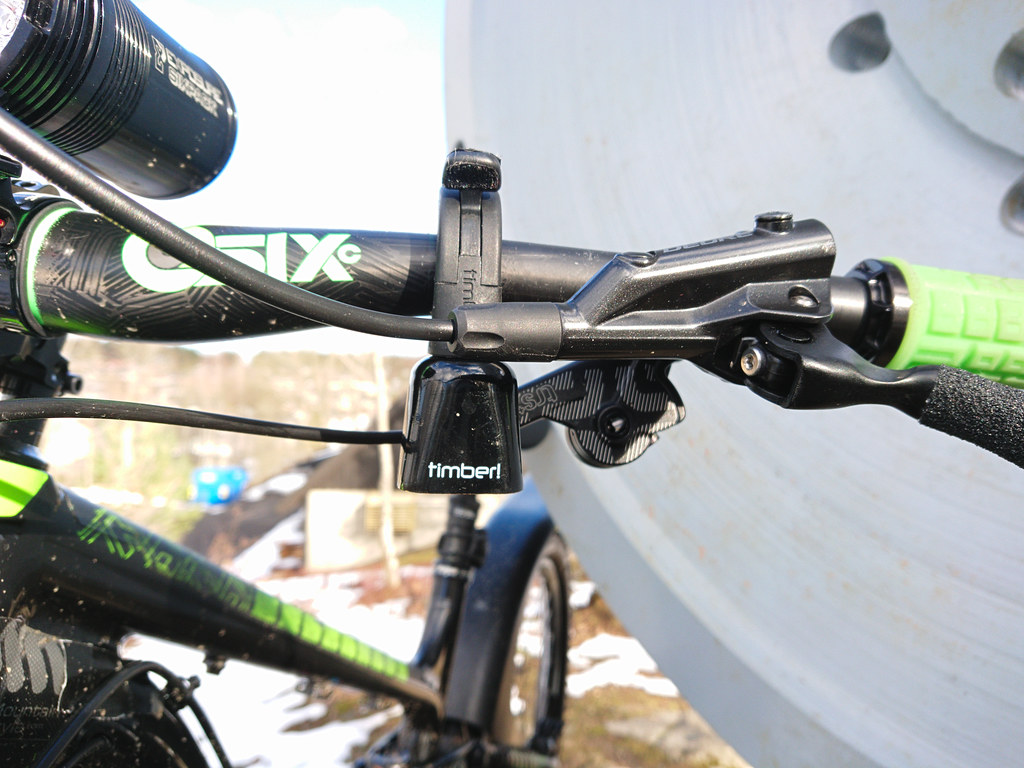
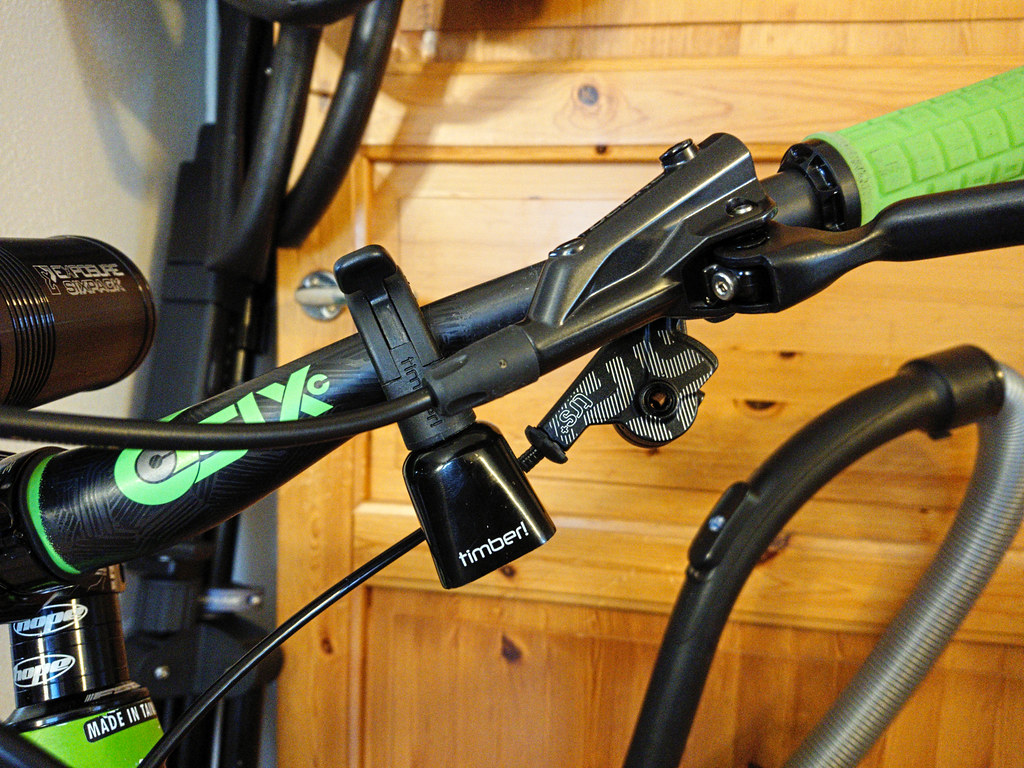
For better clearance for the cable for dropper post I flipped Timber Bell.
Some shots before installing housing and wire
Here it is with the Grip Tape it comes with:
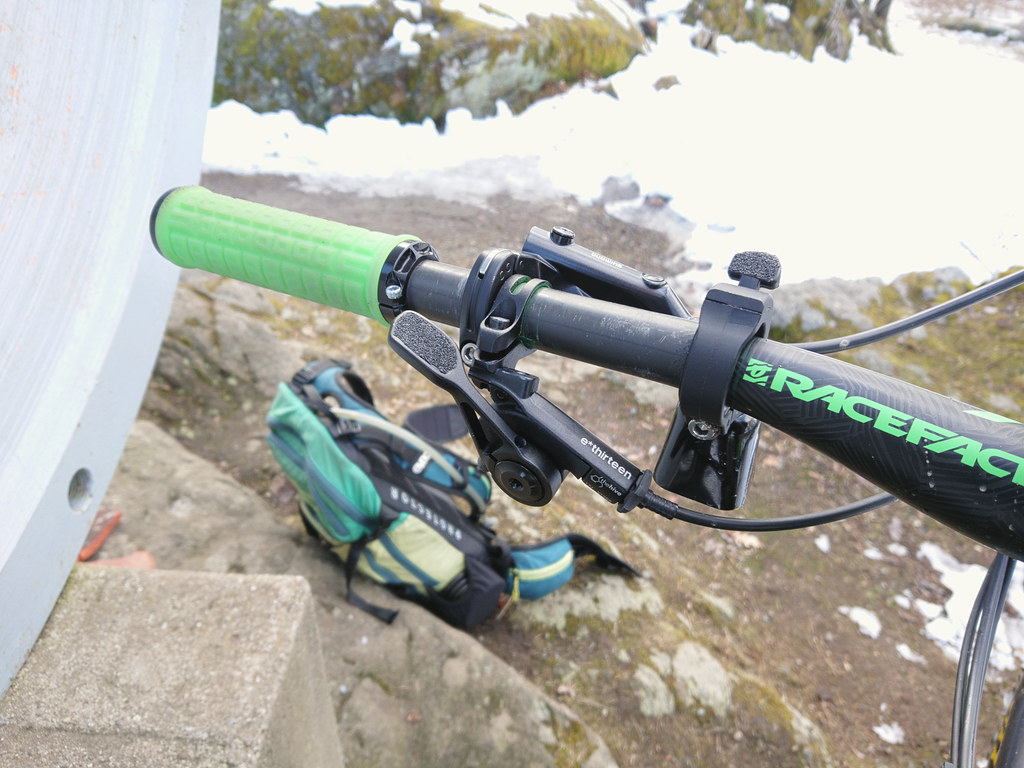
The 17J V10SS remote on the bike
With Tesa anti slip / grip tape installed.
The remote came with grip tape already installed but I installed rougher grip tape, the grip tape that came with it showed slight signs of wear, but I prefer the rougher grip tape.
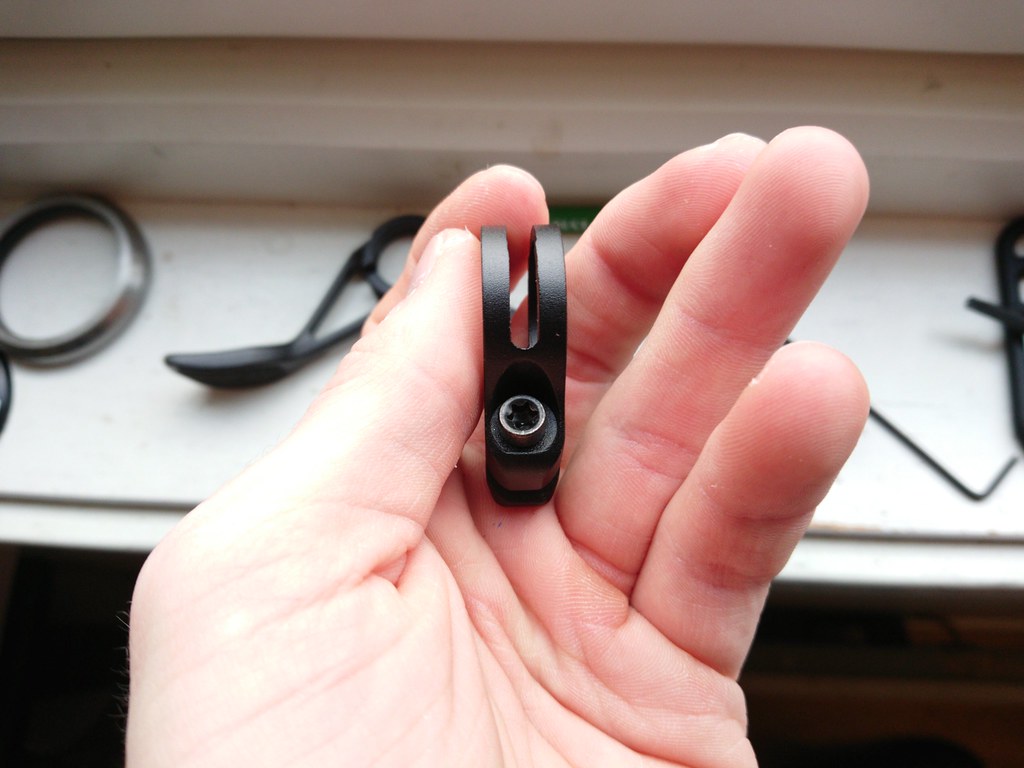
The remote is fastened with a Torx bolt
Cons:
Travel can’t be adjusted.
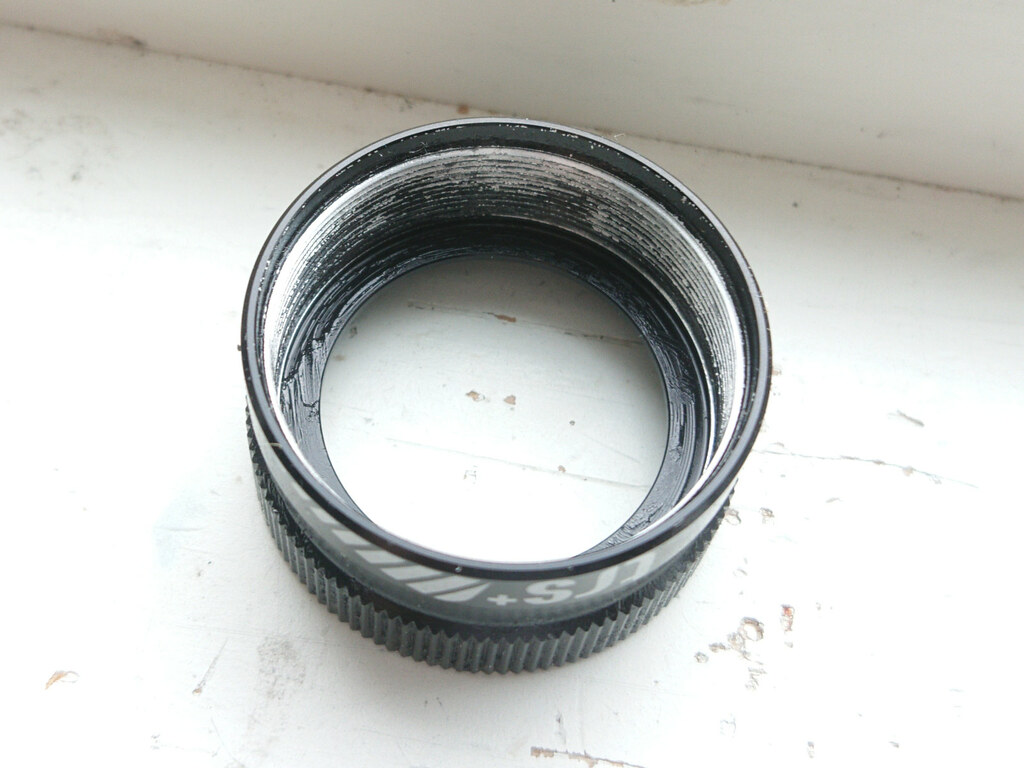
The collar & head is way too high wasting space.
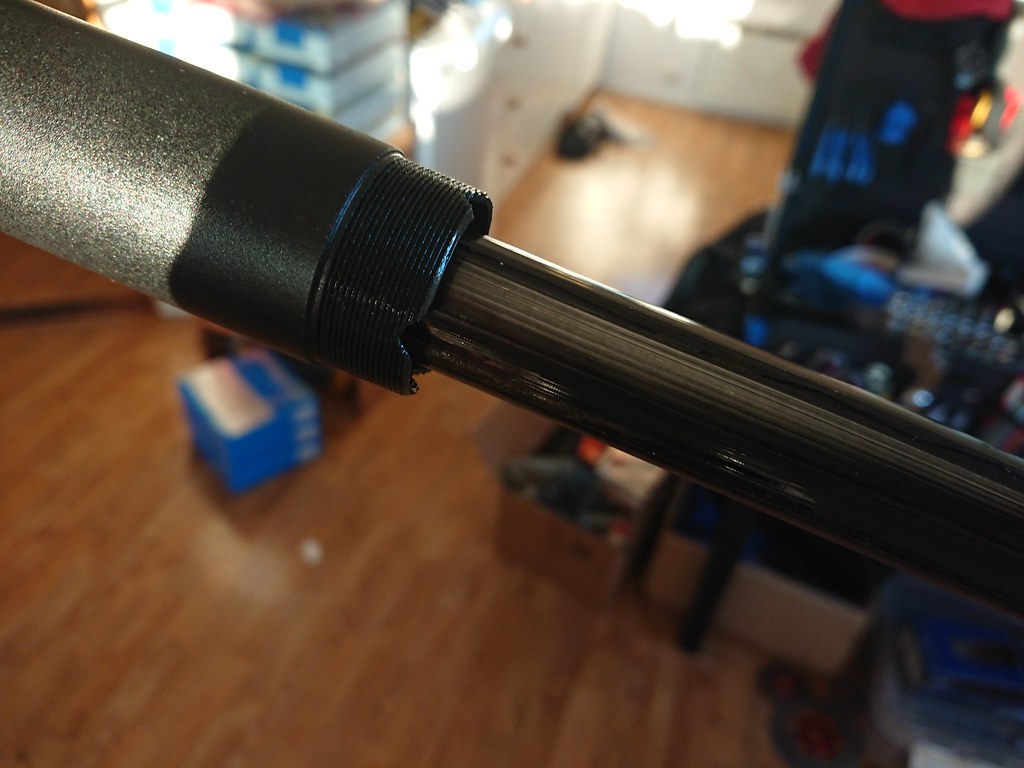
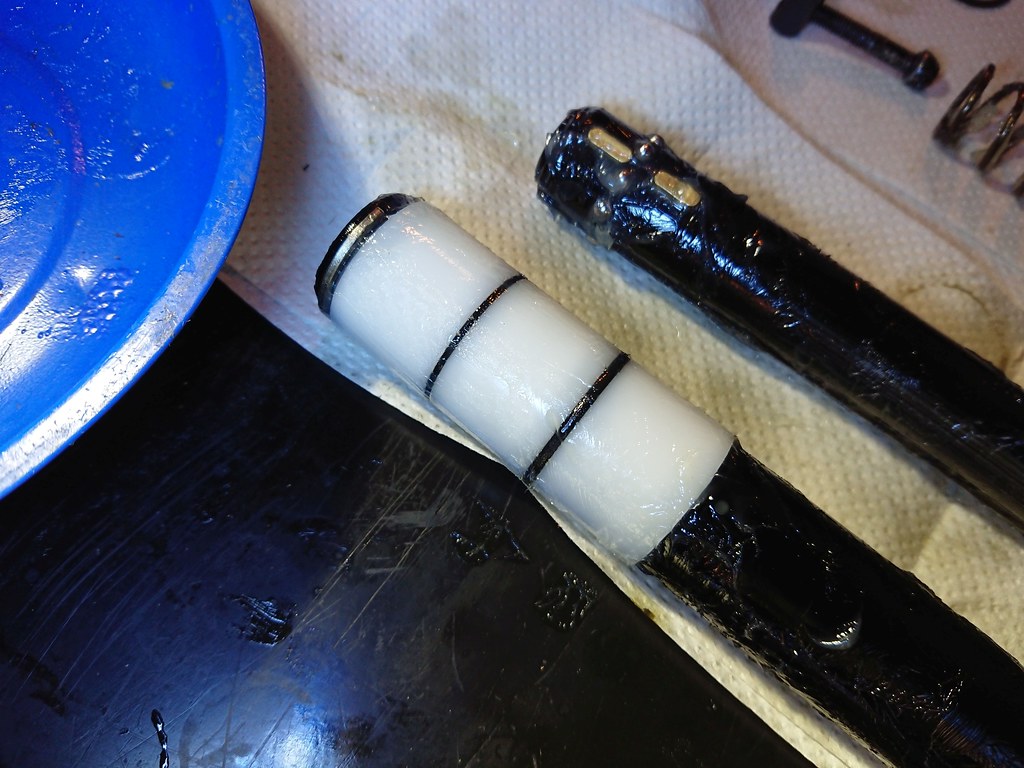
After few weeks of riding the stanchion got a slight discolouration about a cm below the top it is where when the it’s fully down, it’s I side the collar, I am not sure why this happen, but it’s barely visible, and try to get it to show on photo.
You have to have weight on the middle to drop it, but not a problem, if done like that it drops smoothly, it’s faster than Turbine dropper, so light feel drop, this is not surprising at all nor is this a major flaw.
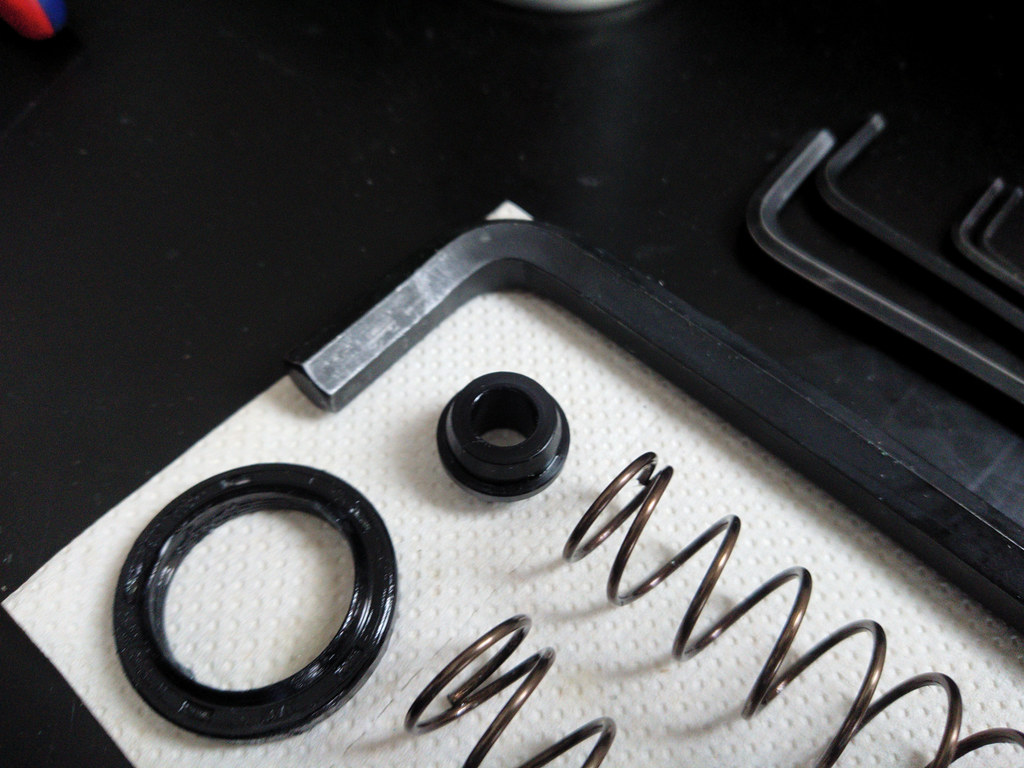
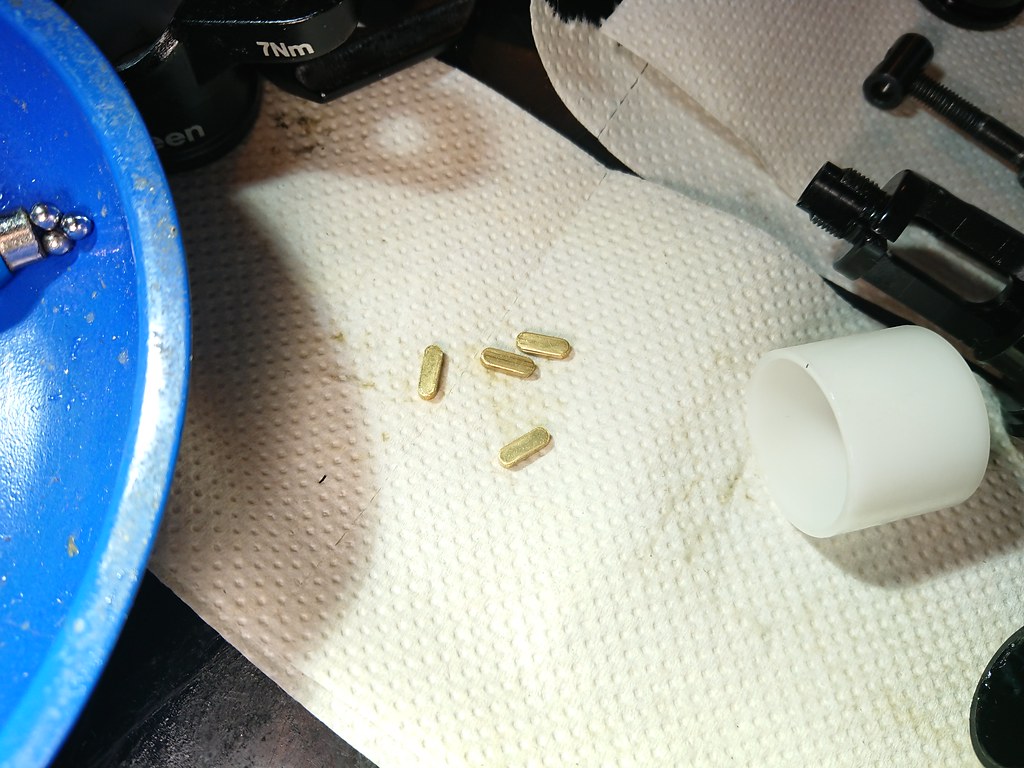
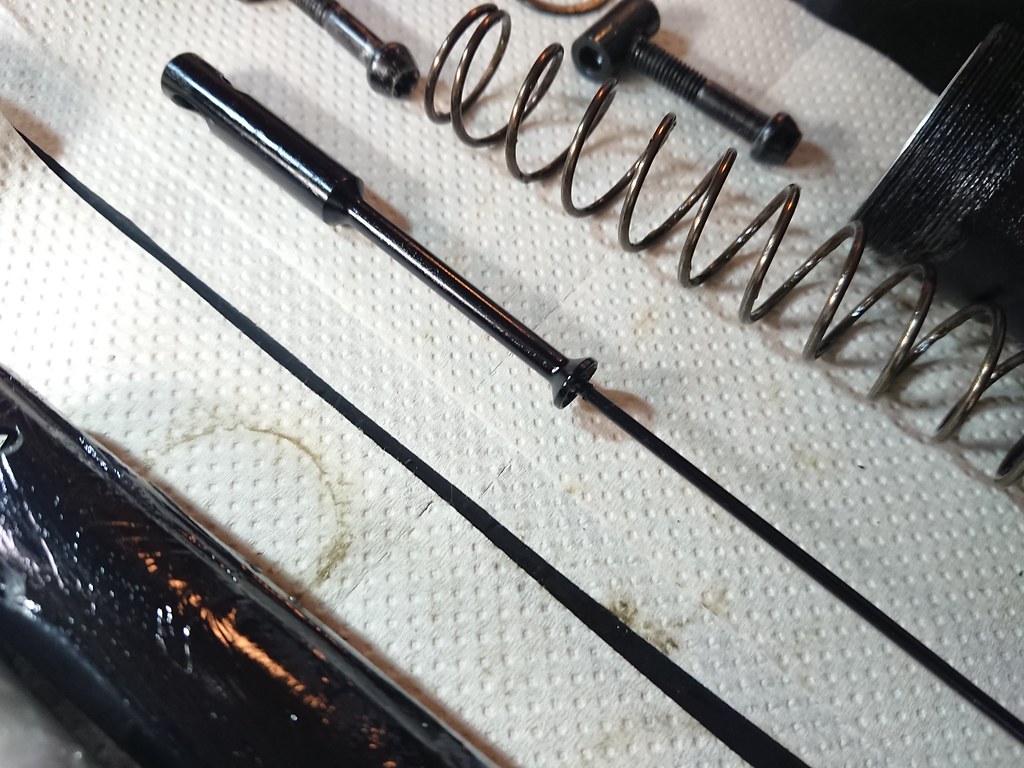
The slot for the brass key holding the head straight is too wide so the head rotates few degrees, this could be felt when riding, especially if doing wheelies There is also up & down play, forward backward rocking play, so a lot more play than the Turbine, which only had side to side rotational play.
The remote has a flimsy plastic cover, it does not cover it properly, it’s not an essential part anyway.
you might be on a ride and the the bolt holding the head secure might loose causing unbearable movement, which means you have to take the seat off, and tighten this gets annoying it will happen often.
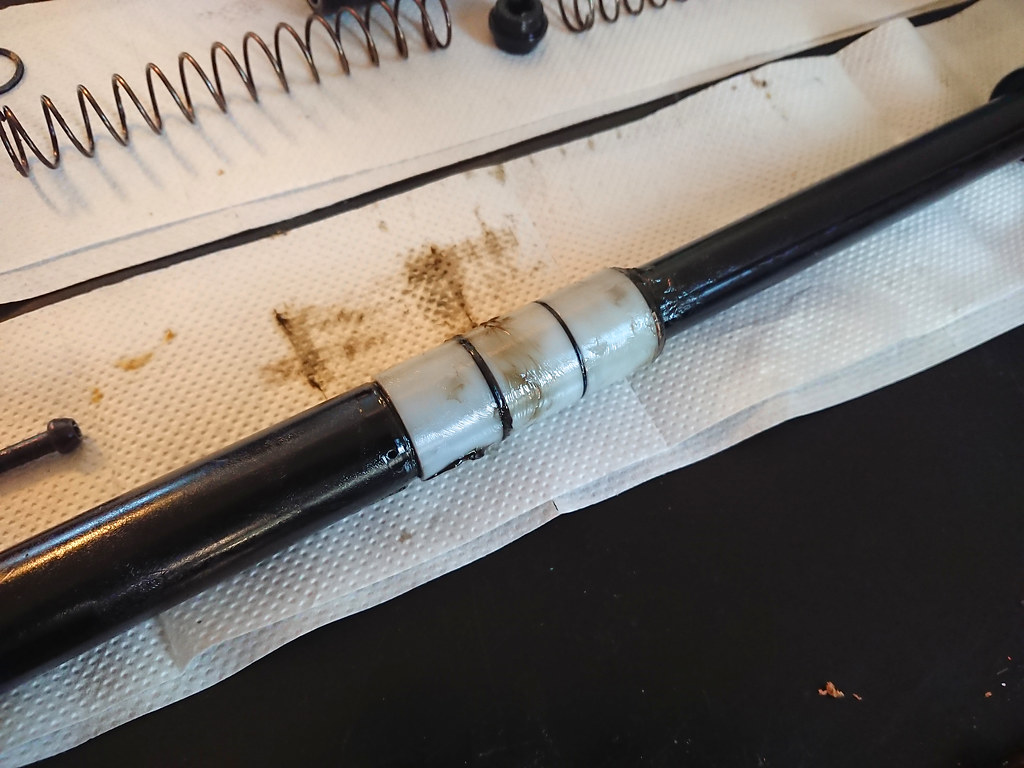
The top of the stanchion gets very greasy after a long ride with dropping the saddle a lot, a lot of up and down, combined with rocking play back and forth.
Clamp head saddle rail bolts can get loose, and might undo enough for the saddle to slip back, I think it’s due to rapid temperature changes & the loads, this is what happens when you take the bike out from the warm home out and ride for few minutes in subzero temps, this has happen with the Bontrager rigid post too, also the Race Face Turbine post.
When I got home I had to fix this, and yes I had on Loctite 243, but this eventually happens anyway, Loctite eventually needs reapplying. So a multi tool is a must, even if everything on the bike has been checked, i had to do this every time, but of course how much it loosened varied.
But I haven’t had issues like this on the Renthal Apex stem, but with Atlas Stem I had to Check it before and after every ride, and during ride to be sure bolt’s did not get loose and the handle bar were spinning. also I got issue with Hope Tech Seat post clamp & Shimano brake levers too. the bolts might undo enough for the saddle to slip back, but these are side effects rapid temperature change, shrinking things slightly, of course different materials will be effected at different rates. You just have to expect this and tighten it down when you are out and check suspension too see if pressures are right, because it can drop a lot, so if this post was a air post it would need to to work with something like 10psi drop or increase, but as this is a mechanic dropper post you don’t have to worry about the pressure.
Once when greasing the collar and screwing on the collar there was resistance, I might have had too much grease, it turned out to be the dust wiper seal which has was skewed, and got worse when threading the collar on, so I had to take the collar off, and hammer it in using a bearing press block. I don’t know why this happen, but I suspect it might be the play in the post, the front to back rocking.
Pros
The lever has nice ergonomics.
No issues with the head snapping, cracking, but I haven’t landed huge jumps and slammed my butt on it, nor brutal impacts, but I did have few crashes where the saddle hit the ground.
Easy to install.
The Torx bolts in the seat clamp have not worn out after several weeks of use, it looks promising.
The barrel adjuster on the lever for wire tension has not snapped or bent yet, so it looks promising.
The barrel adjuster has a nice wheel to turn, it makes it easy to adjust the tension even with one finger
I first posted the review on March 29, 2018, but since then I have more tell, and I improved the review, now in 2019
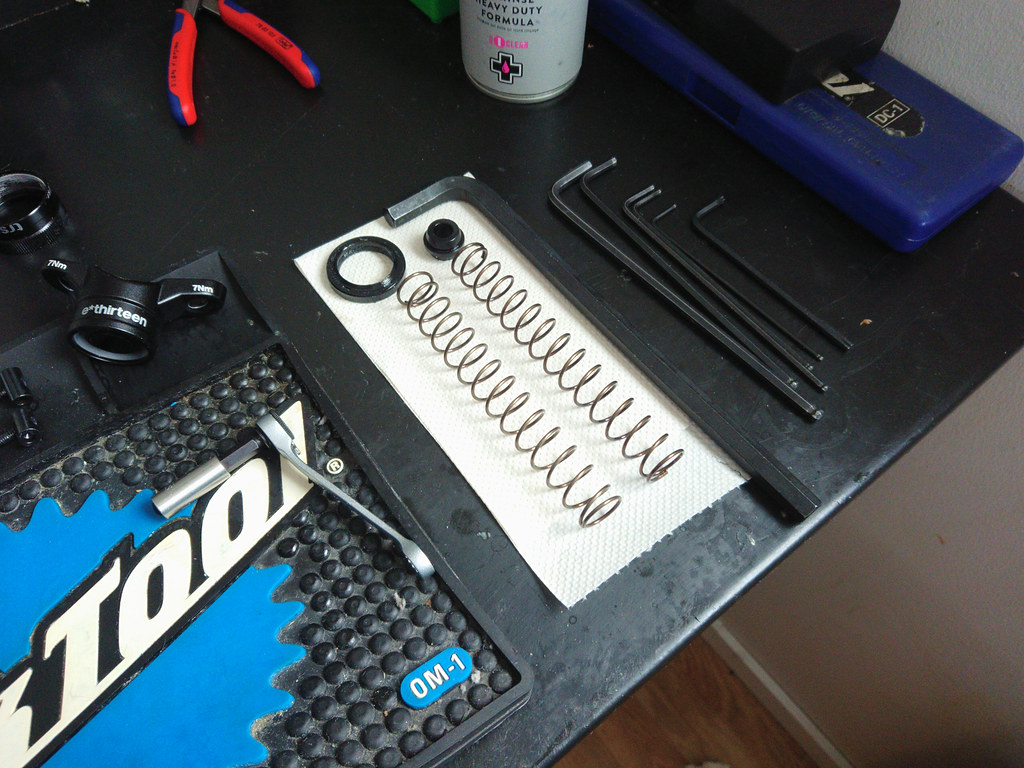
Assembly:
When attaching the housing to chainstay make sure to account for housing movement, when going through travel, I had to only use one zip hook, and use a zip tie halfway on the chainstay to avoid the linkage movement to case braking.
Pros:
Easy pad adjustment
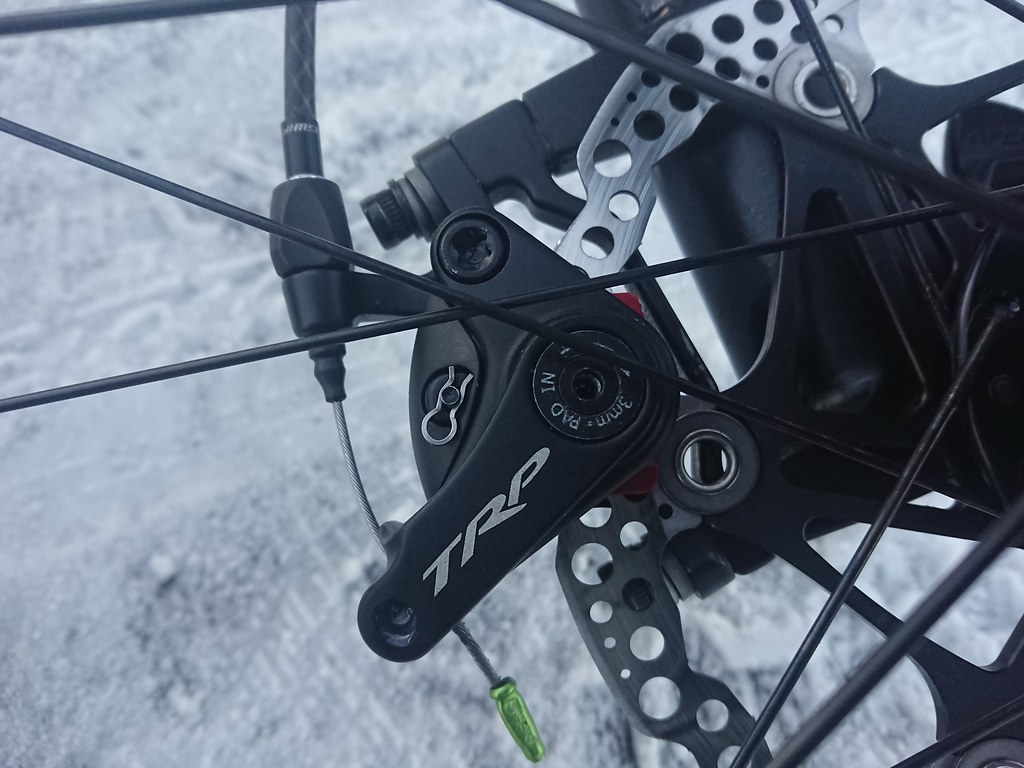
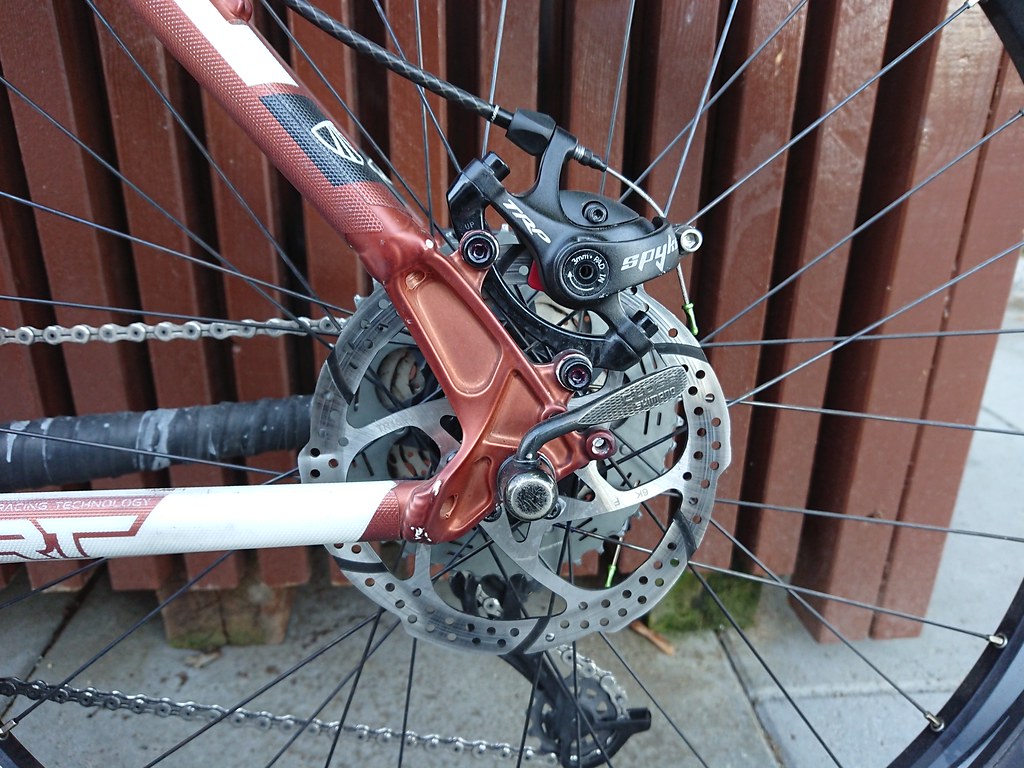
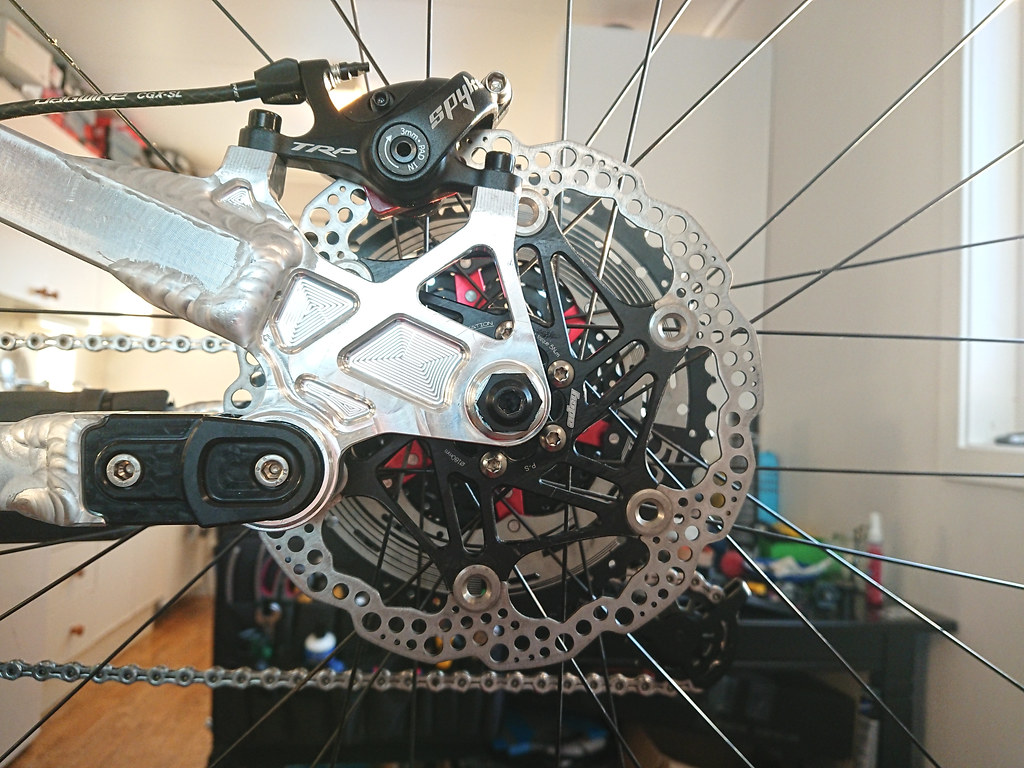
The Spyke brakes offer one finger braking, as powerful as the Shimano m615 brake, but without the issues of leaks and impossible to get seals(without contacting Shimano).The Pad mud gives protection against stones and dirt, so stores can’t interfere the pad/piston movement, So this is a great feature.But like all brakes they only give protection for this, rotors and the inside caliper is exposed, so I still get sand &dirt in there in wet conditions, there is no way to protect the pad surface, things will get in the rotor and can get stuck and make noises, so to prevent crunchy brakes after ride, spray water on the in to the caliper, I do this in shower.
The pads are held in place by a threaded pin, with a clip, which makes maintenance easier.
Smart bolt & pin hold the pads securely in place.
Not Pro but not Con:
This might be a con for kids, or people with very weak fingers. not an issue I have, at least not now.
With the Spyke caliper, the lever is noticeably harder to press than with hydraulics, than a hydraulic brake, due to the stiff return spring. I noticed I my fingers got fatigued from braking after an ca 4-hour ride, but I rode so hard that I could not even pull a manual. After 7 months in March 2018, I Noticed my fingers got very fatigued by braking, I think this was due to braking a lot when riding on grocery rounds between several shops, and to home, a lot of stopping for traffic and, but I went back to hydraulic brake, and I was less fatigued. But I am pretty sure most people will get used to the heavier lever feel, I went back to hydraulic brakes for a while, but Shimano brakes gave me trouble, so I came back to TRP Spyke in 2019, and I was much stronger, and the heavier lever feel was not a problem anymore.
I have been back on TRP Spyke for several months.
I have several of these calipers, due ordering from one shop and it going slow so I ordered from another, but it was not a mistake cus of those barrel adjusters, good I have spares, but I need proper barrel adjuster.
This means I had to take barrel adjuster form a un used caliper and put it on the one on the bike.
I found a video showing how to reduce the pull force:
But I recommend to stay away from modifying the brakes, I don’t know how safe this would be, and it voids the warranty. I think it’s pointless to do it.
Cons:
Play in the pads, there is enough room for the pads to move with the rotor shortly.
can’t remove brake pads from the top or without removing the wheel.
The barrel adjuster snapped on one of the brakes, I touched accidentally hit my hand on the barrel adjuster and it just snapped off, none of the other snapped off yet. Good, I had spares brakes. but the barrel adjuster is clearly weak, it was quite soft, A crash could probably damage it snap it.
The bolts have quite good tolerances at the head, tool fit tighter and with much less play than with shimano bolts. Butt eventually some of the bolts got rounded off slightly, but the tolerances are not perfect with some of the tools I used, which is important, I used fresh park tool Allen keys, which don’t have the highest tolerances, most tools have similar tolerances, if the fit was tighter it would wear slower, but this might also be a material issue, I don’t know which alloy is used for the bolts. the bolt was loosened and tightened over 20+ times over from the end of summer of 2017 to March 2018. but the tightest fit was with TengTools bits, it was great, minimal play, any tighter it would be too tight,.
The barrel adjuster on the caliper is weak, can’t handle the rear suspension. I managed to damage another barrel adjuster, this ttime not by hitting it with my hand, but due to just the rear suspension damaging the threads, and bending the barrel adjuster where the threads are slightly.
The threads were damaged, they were bent, had bumps, and were not turning properly, so I had take one from another un-used rear derailleur . Once I hit my hand on another barrel adjuster which resulted in it snapping in half. So I am sure if you get a hard impact on the barrel adjuster then it could snap off. The bolt does not seem to handle the suspension movement that moves the housing rocking the barrel adjuster damaging it, at least that’s my theory.
Still need a proper pic of the damaged barrel adjuster:
which would be placed here.
not so great unboxing:
Verdict:
On Nicolai/Geometron G1 Brake mounted and centred 180mm rotor Hope Tech Boost conversion kit 2 rotor spacers used No driveside spacer.
I eventually got strong in my fingers, and the stiffer lever feel was not a problem, this is a good caliper with one major flaw, the barrel adjuster is weak, fix that and you got a the whole package.
You really have to look after these brakes, you have to check if the pad adjustment is too loose, and add Loctite 243(or similar) if it is, which is easy to do, and does not take long to do, I check every single week, for some this might be too much hassle, for me it’s not a deal breaker.
If brakes feel spongy or weak:
the barrel adjuster loosened at the brake lever, so use pliers to tighten them, on the trail Wolftooth pack pliers are great for that. you use wrong cables/hoses brake lever body is too flexible one brake pad is too far out. lever reach got changed due to loose reach adjust bolt, some brake levers might have bolt in the lever body, and loosen no matter what, might need to glue it or use red Loctite, but in brake lever blade, it won’t be an issue for sure.